
There are desserts you make once, and desserts you make forever. These Cherry Cheesecake Bars fall firmly into the latter category. They’re the kind of sweet that ushers in nostalgia, sparks compliments.
And travels beautifully — whether you’re showing up for a potluck, surprising neighbors, or simply satisfying a craving with something comforting and familiar.
What makes these bars truly special isn’t just the taste — it’s the simplicity and the way they come together with ingredients you likely already have (or can grab easily). There’s no stand mixer, no complicated technique, and no fussing over mysterious steps.
Just straightforward assembly, baking, chilling, and sharing. At their core, this recipe uses three main ingredients — yellow cake mix, full‑fat cream cheese, and cherry pie filling — supported by a few pantry staples.
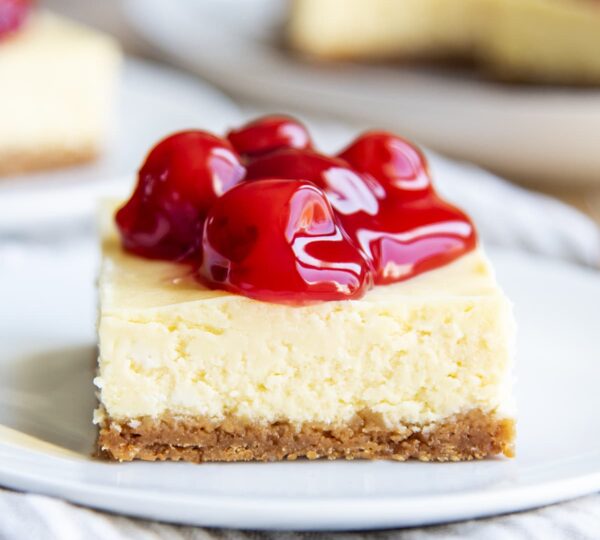
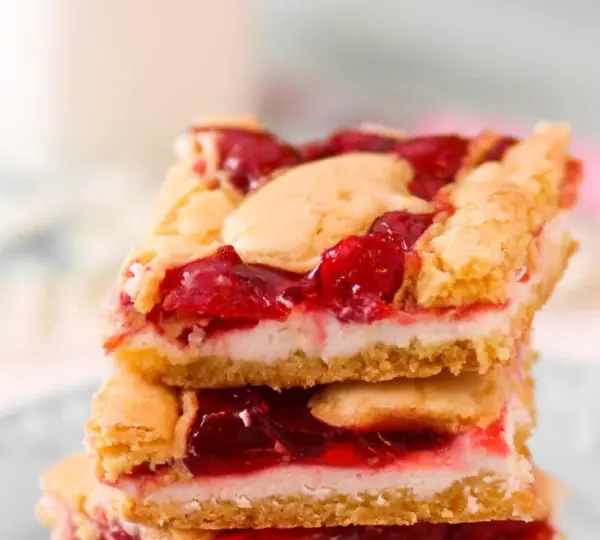
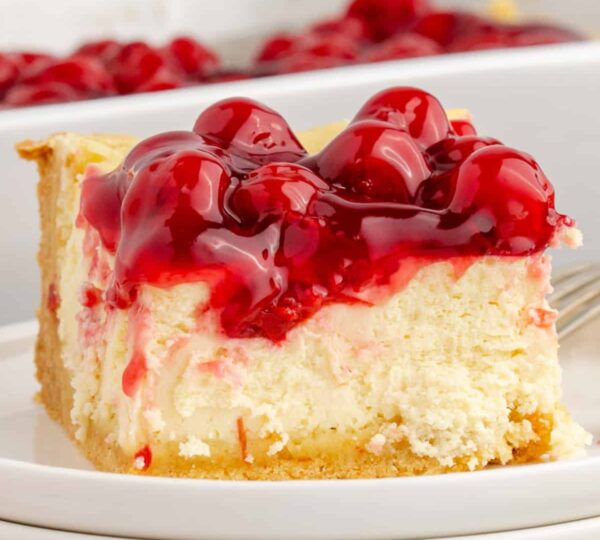
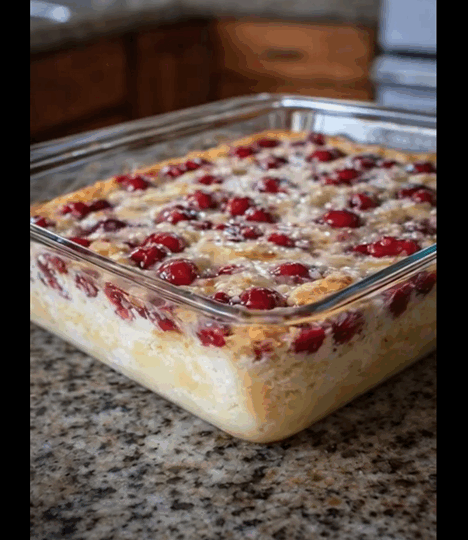
But the combination delivers three distinct layers: a buttery, tender crust; a rich, creamy cheesecake center; and a glossy, jewel‑bright cherry topping.
Why These Bars Work So Well
Before we dig into the recipe and steps, it’s worth appreciating why this combination delivers such satisfying results:
1. Familiar Comfort in Three Layers
Crust (Yellow Cake Mix + Butter + Egg): The base is slightly sweet and tender, almost cookie‑like, with a rich, buttery flavor.
Cheesecake Layer (Cream Cheese + Sugar + Egg): Smooth and creamy, it contrasts the crumbly crust with lush texture.
Cherry Topping (Cherry Pie Filling): Sweet, slightly tart, and visually stunning — it’s the layer that makes these cheesecake bars, not just cheesecake squares.
2. Efficiency Without Compromise
Because the crust starts with cake mix, there’s no need to cream butter and sugar separately or sift dry ingredients. You stir everything together in one bowl, eliminating multiple dishes and speeding up prep.
3. A Crowd Pleaser
These bars aren’t too rich, too heavy, or too sweet. They strike a comfortable balance that appeals to kids and adults alike. They hold up well in a crowd and travel without collapsing or melting.
4. Flexible Serving Options
Serve chilled straight from the fridge.
Add a dusting of powdered sugar.
Pair with vanilla ice cream, whipped cream, or coffee.
Drizzle with chocolate or white chocolate sauce for extra flair.

What You’ll Need: Ingredients & Why They Matter
Here’s the full ingredient list with notes on function and tips for substitutions:
Base Ingredients
1 box yellow cake mix (about 15–16 oz):
Provides the sweet, soft foundation. Yellow cake mix contains flour, sugar, leavening, and flavoring, which eliminates the need for measuring dry ingredients.
2 large eggs (divided):
Eggs bind the crust and cheesecake layers together. Room temperature eggs mix more uniformly.
½ cup (1 stick) unsalted melted butter:
Fat adds tenderness and structure to the crust. Melted butter makes it easy to combine with the cake mix.
8 oz full‑fat cream cheese (softened):
Full‑fat yields the best texture — creamy, smooth, and rich. Low‑fat versions can become grainy.
¾ cup granulated sugar (approximate):
Sweetens and stabilizes the cheesecake layer. You can adjust slightly to taste.
1 teaspoon vanilla extract (optional but recommended):
Enhances flavors and complements the cherry topping.
2 cans (about 21 oz each) cherry pie filling:
Choose good‑quality pie filling — or use your own homemade cherry topping if preferred.
Pinch of salt:
Just enough to balance sweetness and elevate flavors.
Note on Cake Mix: Yellow cake mix works exceptionally well because of its neutral flavor and sufficient structure. Substituting white cake mix works too; chocolate or red velvet will change the flavor profile.
Equipment You’ll Need
9×13 inch baking pans (2)
Large mixing bowl
Rubber spatula or wooden spoon
Hand mixer (optional but helpful)
Cooling rack
Sharp knife for slicing
Plastic wrap or foil for chilling
Step‑by‑Step Instructions
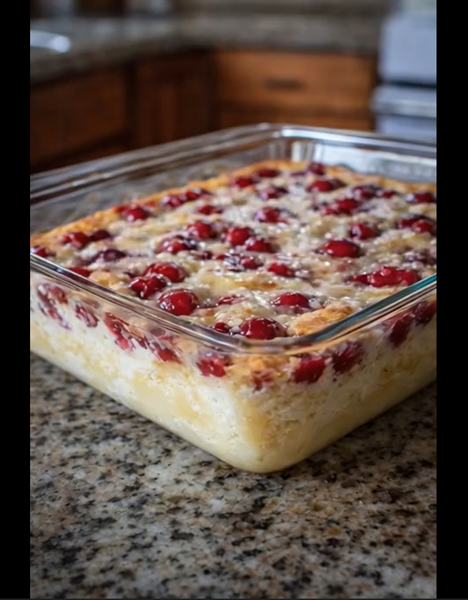
1. Prep & Pan Setup
Preheat oven to 350°F (175°C).
Grease two 9×13 pans lightly with butter or nonstick spray.
Why two pans? Because this recipe makes enough for sharing — one for you, one for someone you love.
2. Make the Crust
In a large bowl:
Add yellow cake mix.
Pour in melted butter and 1 egg.
Sprinkle in a pinch of salt.
Stir with a spatula or wooden spoon until combined and crumbly, then press firmly into the bottom of both pans in an even layer.
Tip: Use the bottom of a measuring cup to press the crust flat — it makes an even, compact base.
Prepare the Cheesecake Layer
In the same bowl (no need to wash):
Add the softened cream cheese.
Pour in ¾ cup sugar, 1 egg, and 1 teaspoon vanilla.
Mix until smooth and creamy.
Tip: If you have a hand mixer, use it on low speed to avoid air bubbles.
Spread the cheesecake layer gently and evenly over the crust in both pans.
4. Add the Cherry Topping
Spoon the cherry pie filling evenly over the cheesecake layer.
You can leave it “as is” for a clean, classic look.
Or, use the back of a spoon to swirl the cherries into the cheesecake layer lightly.
Pro Tip: If you want a lighter cherry presence, save ½ cup of filling for serving.
5. Bake
Place both pans in the oven and bake for 28–32 minutes, or until the edges are set and the center no longer looks wet.
The cheesecake may jiggle slightly — that’s okay. It will set more as it cools.
Avoid overbaking; you want creamy texture, not dry.
6. Cool & Chill
Let the bars cool on a rack for about 30 minutes.
Then cover and chill in the refrigerator for at least 2 hours — longer is better.
Chilling helps the bars slice cleanly and allows the layers to firm up into their signature texture.
Serving Suggestions
These Cherry Cheesecake Bars are delicious on their own — but you can dress them up!
Classic Enhancements
Dust with powdered sugar for a pretty, simple finish.
Top with whipped cream before serving.
Add vanilla ice cream for an indulgent dessert.
Drizzle with chocolate or caramel sauce — a favorite twist for special occasions.
Beverage Pairings
Coffee or espresso balances the sweetness.
Hot tea (black or herbal) is calming and complementary.
Milk or hot chocolate makes these bars feel extra cozy.
Tips for Perfect Bars Every Time
1. Use Full‑Fat Cream Cheese
Low‑fat or whipped varieties don’t hold structure well and can make the cheesecake layer grainy.
2. Don’t Skip Chilling
Warm cheesecake is delicious, but for slicing and texture, chilling is key.
3. Temperature Matters
Bring the cream cheese and eggs to room temperature first so they mix evenly.
4. Swirl Variation
For a marbled effect, dollop cherries on the cheesecake layer and swirl gently before baking.
5. Watch Your Bake Time
Ovens vary. Check at 28 minutes — the cheesecake layer should no longer be shiny and wet.
Ingredient Variations and Add‑Ins
Want to customize these bars? Here are fun directions:
Fruit Swaps
Blueberry pie filling
Strawberry
Peach
Mixed berry
All offer a similar glossy finish with slightly different flavor profiles.
Flavor Enhancements
Add lemon zest (½–1 teaspoon) to the cheesecake layer for brightness.
Sprinkle graham cracker crumbs on top before chilling.
Fold in white chocolate chips to the crust for extra richness.
Crust Alternatives
Graham cracker crust (crumbs + butter + sugar) for a traditional cheesecake feel.
Oreo crust for a chocolate twist.
Shortbread crust for extra buttery texture.
Storage & Shelf Life
Refrigerator
Store in an airtight container for 4–5 days.
Bars stay moist and flavorful, and flavors blend even more over time.
Freezer
Wrap tightly with plastic wrap and foil.
Freeze for up to 2–3 months.
Thaw in the fridge overnight before serving.
Make‑Ahead & Gift‑Ready
One of the best things about this recipe is how well it travels and keeps. Bake early in the day, chill, and you’re ready to gift later. Because it yields two pans, you can:
Keep one for your family.
Gift one to neighbors, friends, or hosts.
Bring to potlucks or celebrations without stress.
Wrap in parchment paper and a ribbon, or deliver with a handwritten note — it’s a thoughtful way to spread comfort.
Why People Love It: The Heart of Every Bite
These bars aren’t just dessert — they’re memory, comfort, and community:
They recall childhood potlucks and kitchen trays passed around tables.
They’re simple enough for everyday baking but special enough for holidays.
They don’t demand perfection — they reward warmth and intention.
They’re the bars you’ll make for neighbors after a big storm, for game night, for bake sales, and for your own late‑night cravings.
They bring joy not through complexity, but through approachable sweetness and nostalgic warmth.
Frequently Asked Questions (FAQs)
Q: Can I substitute light cream cheese?
A: Technically yes, but the texture will be less creamy and may become slightly grainy. Full‑fat yields the best results.
Q: Can I halve the recipe?
A: Yes — halve all ingredients and use an 8×8 pan. Bake time may be slightly shorter (about 25–28 minutes).
Q: My bars cracked — why?
A: Slight cracks are normal and don’t affect taste. Avoid overbaking and let them cool gradually.
Q: Can kids help make these?
A: Absolutely! With supervision on stirring and oven use, this is a great beginner‑friendly dessert.
A Dessert That Lives in the Heart
At the intersection of simplicity, nostalgia, and shareability lies a recipe that feels like home. These Cherry Cheesecake Bars aren’t just a sweet treat — they’re a reminder that sometimes the most comforting desserts are the ones you can make with love and serve with ease.
From the buttery crust to the creamy middle and vibrant cherry topping, every layer contributes to a dessert that’s greater than the sum of its parts.
So stir, spread, bake, and share… and savor every moment of the joy that follows.