
Finding yourself with a can of food and no can opener can be unexpectedly stressful. Whether you’re at home during a sudden appliance failure, camping in the wilderness, traveling in a remote area.
Or coping with a power outage, a sealed metal can suddenly becomes an obstacle between you and your meal. While many people might reach for knives, scissors, or even rocks in desperation, there is a safer, more reliable method using something almost everyone already has at hand: a sturdy metal spoon.
Though it might sound unconventional at first, this technique is practical, safe, and surprisingly effective when done correctly.
The method requires only a regular metal spoon, patience, and a bit of careful technique. Unlike makeshift approaches that risk injury, using a spoon reduces the chances of cuts from jagged metal and avoids the hazards of applying excessive force to unfamiliar tools.
In this guide, we will explore the method in depth, explain the science behind why it works, provide step-by-step instructions, and offer tips for maximizing safety and efficiency.
Why a Spoon Works
At first glance, it might seem impossible that a spoon could open a metal can. However, the process relies on pressure and friction.
The tip of the spoon acts as a concentrated point of force, while the motion you apply generates friction against the thin metal of the can lid. Over time, this friction wears down the metal just enough to create a puncture.
Once the initial hole is formed, the spoon can be leveraged along the edge of the lid to gradually lift it, eventually allowing the can to open completely.
The rounded and smooth edges of a spoon also reduce the risk of jagged cuts compared to knives or other sharp objects. This is particularly important in emergency situations where proper first-aid resources may not be immediately available.
Materials Needed
To successfully open a can with a spoon, gather the following:
A sturdy metal spoon: Stainless steel is ideal. Avoid plastic or thin disposable spoons, as they are unlikely to withstand the pressure.
A flat, stable surface: This ensures that the can does not slip during the process. A countertop, table, or cutting board works well.
A towel or non-slip mat (optional): This adds stability and prevents accidents on smooth surfaces.
Patience: Unlike a traditional can opener, this method takes a few minutes. Rushing increases the risk of injury.
Step-by-Step Instructions
Step 1: Prepare Your Workspace
Place the can on a flat, stable surface. Ensure the can is positioned so it cannot roll or slip. If available, place a towel or non-slip mat underneath for extra security.
Safety tip: Avoid holding the can in your hand while applying pressure, as slipping could lead to cuts. Stability is crucial.
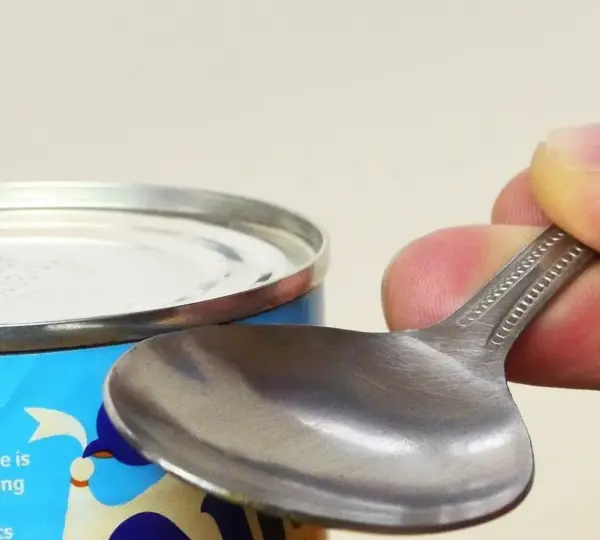
Step 2: Position the Spoon
Hold the spoon firmly in your dominant hand. Grip it like a writing utensil, with the tip pointing downward.
Position the tip of the spoon against the inner edge of the lid, where the top meets the can’s body. This spot is typically the thinnest part of the metal and the easiest to puncture.
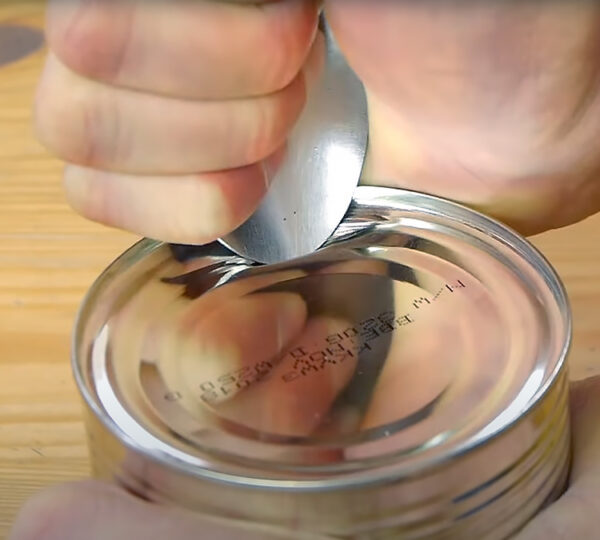
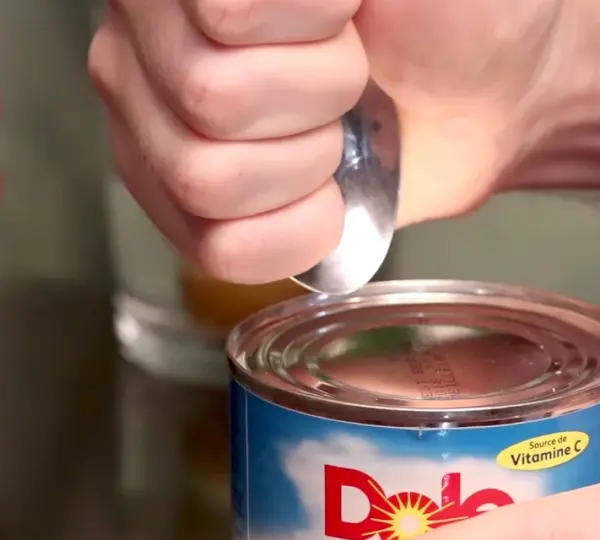
Step 3: Apply Pressure and Rub
Using steady, consistent pressure, rub the tip of the spoon back and forth over the same spot. The friction will gradually weaken the metal.
Don’t press too hard at first; let the metal wear down gradually.
Focus on a single point rather than moving around the lid randomly.
You may hear a faint scratching or feel the metal give slightly — this indicates progress.
After a short period, usually a few minutes depending on the can’s thickness, you should feel a small opening forming.
Step 4: Create the Initial Hole
Once the lid begins to puncture, gently wiggle the spoon tip inside the opening. This enlarges the hole slightly and prepares it for guiding the spoon along the edge.
Move slowly to avoid slipping.
Ensure your fingers remain clear of the edges, as the metal can be sharp.
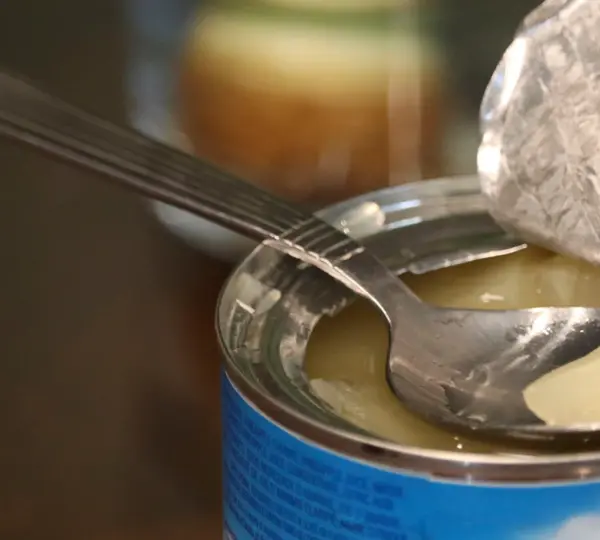
Step 5: Open the Lid Gradually
After creating the initial puncture, continue using the spoon to leverage along the rim of the lid.
Insert the tip of the spoon into the opening and gently lift.
Work your way around the lid, lifting a small section at a time.
Repeat until the lid is sufficiently loosened to remove entirely.
Patience is key. Rushing may bend the spoon or cause injury. Take breaks if needed.
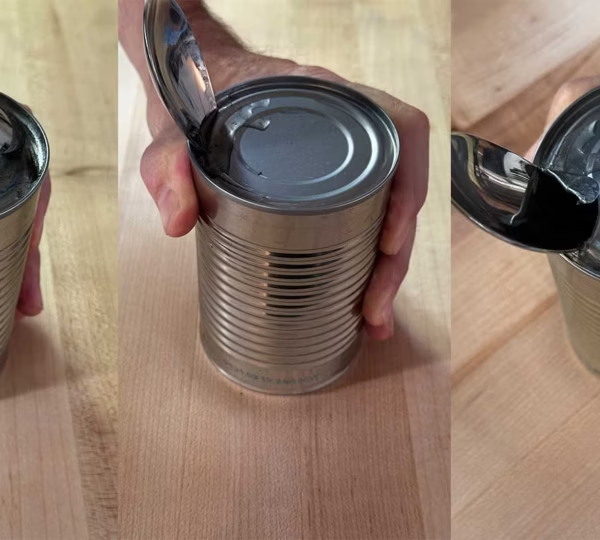
Step 6: Remove the Lid Safely
Once the lid is loosened:
Slowly lift it away from the can.
Place it aside carefully to avoid cuts.
Dispose of or set aside the lid in a safe place — it is often jagged along the puncture points.
The rounded edges of the spoon reduce the risk of sharp metal exposure compared to knife or scissors methods.
Tips for Efficiency
Choose a thick spoon: Heavier utensils provide more leverage and durability.
Stabilize the can: Using both hands — one holding the spoon and one steadying the can — improves control.
Wear gloves (optional): This provides additional protection if the metal tears unevenly.
Angle matters: A slight tilt toward the point of friction ensures maximum pressure without slipping.
Use short strokes: Short, repeated motions create consistent wear on the metal.
Common Mistakes to Avoid
Using a thin or plastic spoon: Will likely bend or break.
Rushing: Can result in slips or jagged edges.
Holding the can in hand while puncturing: Increases the risk of injury.
Skipping the friction step: Trying to pry immediately may damage the spoon or cause accidents.
Why This Method is Useful
1. Emergencies and Power Outages
In situations where electricity is unavailable, and traditional can openers are inaccessible, this method ensures you can access canned food without delay.
2. Camping and Outdoor Activities
Backpackers and campers often have limited tools. A sturdy spoon in a multi-use kit can double as a cooking utensil and emergency can opener.
3. Travel and Student Life
Hostels, dorms, or temporary accommodations may lack proper kitchen tools. A spoon ensures that canned meals can be opened without searching for additional tools.
Alternative Household Items
While the spoon method is safe and reliable, there are other tools that can also work in emergencies:
Butter knife: Works similarly but requires more caution due to sharp edges.
Metal file: Can create friction and puncture the lid.
Concrete or flat rock: Rubbing the top edge can thin the metal, but this is messier and less precise.
Compared to these alternatives, the spoon method is safer and cleaner, especially indoors.
Safety Considerations
Even with a spoon, safety is paramount:
Keep your non-dominant hand away from the puncture area.
Do not use excessive force; let friction do the work.
Inspect the lid before handling it; even small tears can be sharp.
Wash the spoon thoroughly before and after use, especially if it contacts the lid’s metal or food residue.
How to Incorporate This Method Into Your Emergency Kit
A spoon can be an essential part of a compact emergency kit. To prepare for unexpected situations:
Include a sturdy stainless steel spoon in your kit.
Pack a small cutting board or flat surface if possible.
Add kitchen gloves for extra protection.
Practice the technique with a spare can to become familiar with the steps.
Conclusion
Opening a can without a can opener may initially seem daunting, but with a simple metal spoon, patience, and proper technique, it is entirely feasible. This method is:
Safe: Rounded edges reduce the risk of injury.
Effective: Friction and leverage work on most canned foods.
Accessible: Requires a common household item.
Versatile: Useful at home, outdoors, or in emergencies.
The next time you face a power outage, camping trip, or forgotten kitchen tool, remember: your spoon is more than just a utensil — it is a reliable, practical, and safe alternative to a can opener.
With careful attention and patience, it can unlock meals and sustain you in unexpected situations.
Key Takeaways:
Always use a flat, stable surface.
Apply steady friction to the lid before attempting to lift.
Work slowly and consistently around the rim.
Keep hands clear of jagged edges.
Wash utensils after use.
This method demonstrates that everyday items can be surprisingly versatile, transforming a simple spoon into an emergency survival tool.
A few minutes of patience and careful technique can allow access to food and ensure safety, even in the absence of conventional kitchen tools.